


/IN THIS ARTICLE
◊ PART A
♥ Natural Hair Dye Hacks: Get Gorgeous Shades Without the Damage
♥ Why Commercial Hair Dye Might Be a Hair Nightmare
♥ My Hair Journey: From Chocolate Brown to Caramel Ombre
♥ Cinnamon Hair Dye: Sweet and Subtle
♥ Hydrogen Peroxide DIY: Quick and Effective
♥ Why Go DIY?
♥ Final Thoughts
◊ PART B
♥ DIY Hair Dye: A Natural Way to Color Your Hair at Home
♥ Why Go Natural with Hair Dye?
♥ How Long Will It Last?
♥ The Final Verdict
♥ Few Natural Hair Dyes
♥ FAQ
Natural Hair Dye Hacks: Get Gorgeous Shades Without the Damage
Why Commercial Hair Dye Might Be a Hair Nightmare
Let’s be real here—industrial hair dyes have a bit of a popularity, and now not the best kind. Sure, they promise you salon-worthy hair, but at what cost? Many people who regularly dye their hair observe thinning strands and breakage through the years. Ever visible a person’s hair searching like a scraggly bird’s nest after a dye mishap? Yeah, not an amazing look.
Not to say, once you start dyeing, it’s a commitment. You’re stuck in this endless cycle of touch-ups that go away your pockets lighter and your nerves frayed. Roots begin displaying, and all at once, your hairline isn’t only a hassle—it’s a full-blown crisis.
But right here’s the best news: you don’t should smash your hair or your price range to exchange up your look. I’ve discovered some kitchen-friendly DIY hair dye techniques that can be easy, gentle, and—bonus—don’t depart you searching like you lost a struggle with bleach.
My Hair Journey: From Chocolate Brown to Caramel Ombre
Before we dive in, allow me to provide you with a short backstory. My natural hair color is a wealthy darkish chocolate brown. These days, I’m rocking a light caramel ombre that I accomplished without a single drop of commercial hair dye. How? By using easy, natural components you can locate them at any grocery keep or maybe in your pantry.
Here are my move-to methods:
Cinnamon Hair Dye: Sweet and Subtle
What You’ll Need:
- A mixing bowl
- Your favourite conditioner
- Ground cinnamon
- Olive or almond oil
- An antique blouse (consider me, this will get messy!)
- A kitchen brush or applicator
- Hair clips
Step-by means of-Step Instructions:
- Mix Your Ingredients:
- Combine six tablespoons of ground cinnamon, a generous squirt of conditioner, and one tablespoon of olive or almond oil in your bowl. Stir until you get a thick, gooey paste that’s clean to apply and won’t drip anywhere.
- Prep Your Hair:
- Part your hair down the center and put on that vintage shirt—matters are approximately to get messy. Using your kitchen brush, apply the cinnamon mixture from the roots to the tips. Be thorough but keep away from getting it in your face; cinnamon could make your skin itch.
- Set It Up:
- Once your hair is lined, twist small sections into rolls and stabilize them with hair clips. Wrap a towel around your head and let the aggregate work its magic for about eight hours.
- Repeat for Best Results:
- Cinnamon works progressively, so you’ll need to do that two times a week for approximately weeks to look at an important trade. It’s a sluggish method, but the results are totally worth it—consider me.
Hydrogen Peroxide DIY: Quick and Effective
If persistence isn’t your factor, hydrogen peroxide is probably the hack for you. This technique is quicker and might show outcomes in only a few hours.
What You’ll Need:
- A darkish spray bottle (peroxide breaks down in light)
- Hydrogen peroxide (3%)
- Water
- A towel
Step-via-Step Instructions:
- Mix Your Solution:
- Fill the spray bottle halfway with hydrogen peroxide and the alternative 1/2 with water. Shake it properly. If you have darkish hair like me and want a greater dramatic trade, you could bypass diluting the peroxide.
- Test Before You Commit:
- Always take a look at a small, hidden strand first to see how the color develops. This step is critical, specifically in case you’re new to DIY hair dyeing.
- Apply the Mixture:
- Spray the answer frivolously onto your hair until it’s damp but no longer soaking moist. Wrap a towel around your hair and permit it to sit for approximately 30 minutes.
- Wash and Condition:
- After half an hour, wash your hair with your typical shampoo and observe up with conditioner to hold it soft and attainable.
Pro Tip:
If your hair is at the darker aspect, hydrogen peroxide can from time to time leave reddish tones. To counteract this, use a silver shampoo for a cooler caramel end.
Why Go DIY?
Here’s the thing: herbal hair dye methods like cinnamon and hydrogen peroxide aren’t simply kinder in your hair—they’re also loads cheaper. Commercial dyes are loaded with chemical substances that could weaken your strands over time, however, these DIY options let you experiment without the guilt.
Plus, there’s something distinctly enjoyable about reaching suitable, salon-worth colors and the usage of components from your kitchen. Whether you’re after subtle highlights or an ambitious new appearance, these techniques are versatile and customizable.
Final Thoughts
Switching up your hair coloration doesn’t suggest sacrificing your hair’s health or breaking the bank. With a little endurance and a little creativity, you may attain stunning, natural-searching effects right at domestic.
So, grasp a few cinnamon or a bottle of peroxide, and allow the transformation to begin. Who says you can’t have suitable hair without drama?
Try those strategies and allow your hair to shine—actually!
DIY Hair Dye: A Natural Way to Color Your Hair at Home
Let’s face it, oldsters—in relation to hair dye, most folks think of a chemical-stuffed experience at the salon or grabbing a boxed solution off the pharmacy shelf. But what if I told you that coloring your hair at home, clearly, isn’t simply possible but extraordinarily simple? That’s proper—you could whip up your very personal hair dye with the usage of natural elements. No harsh chemical compounds, no sky-excessive salon payments, and manner extra a laugh. Let’s dive into how you can acquire this, grade by grade.
Why Go Natural with Hair Dye?
Before we get into the nitty-gritty, let’s talk about why natural hair dye is well worth a shot. For one, it’s kinder in your hair and scalp. Those salon chemical substances can be super harsh, leaving your strands dry and brittle. Natural options, alternatively, are gentle and regularly nourishing. Plus, in case you’ve got darkish hair with a bit of gray peeking, you understand the struggle of keeping a rich, even color. Natural dyes might not last as long as chemical ones, however, they’re an extremely good way to hold matters sparkling in between salon visits.
Step 1: Gather Your Ingredients
The first step is selecting your natural clothes. This depends on the shade you’re aiming for:
- For brunettes: Black tea, coffee, or walnut shells are extremely good options.
- For blondes: Chamomile and calendula are extremely good for reinforcing golden shades.
- For redheads: Hibiscus flowers or beet juice can upload a reddish tint.
Once you’ve determined your herbal factor, chop or mash it up. The smaller the portions, the higher—this exposes extra surface vicinity, making your dye more potent and richer. You can use either sparkling or dried herbs but take note of your unique needs. For example, clean herbs would possibly launch extra moisture, even as dried ones are greater concentrated.
Step 2: Mix It Up
Now, it’s time to create your base. You have principal alternatives: a paste or a tea. Here’s a way to take care of each:
- For a paste: Combine your chopped herbs with hot water. Add the water step by step until you get a thick, toothpaste-like consistency. Hot water helps release the color by commencing up the “pores” of the herbs.
- For tea: Steep about ½ cup of herbs in 2 cups of warm water. Let it take a seat until the aggregate cools. Strain out the herbs to leave simply the liquid, then pour it right into a squirt bottle. This will make making use of it for your hair tons less complicated.
Step 3: Apply Like a Pro
Whether you’re working with a paste or a tea, utility is prime. Here’s the way to do it:
- For tea: Use the squirt bottle to use the aggregate in your scalp and hair. Keep squirting until the tea is gone, ensuring each strand is soaked.
- For paste: Use your arms or a broom to apply the combination immediately to your roots and hair. Be beneficiant!
Once your hair is absolutely coated, twist it up and secure it with a clip. Cover your head with a moist towel or a bath cap to fasten in moisture and heat—this allows the color to penetrate deeper.
Step 4: Wait It Out
Here’s the part in which staying power is your satisfactory friend. Leave the mixture on your hair for about half an hour. You can pass longer if you need a deeper color, however, don’t push it too some distance—in particular, if this is your first time trying a natural dye.
Pro tip: Do this procedure over a bathtub or inside the bath to keep away from a messy cleanup. Herbal dyes can stain, and accept as true with me, you don’t need to spend your afternoon scrubbing splashes off the restroom wall.
Step 5: Rinse and Reveal
When you’re equipped, rinse the dye out thoroughly. Use lukewarm water and take your time to ensure there’s no residue left in the back. Avoid shampooing straight away; let the color settle for a minimum of 24 hours for first-class outcomes.
How Long Will It Last?
Natural hair dyes aren’t as lengthy-lasting as chemical ones, but with a little care, you could make the color stick around longer. Limit how regularly you wash your hair, use sulfate-loose shampoos, and attempt a vinegar rinse to seal the shade.
If you notice the shade fading, you may constantly repeat the manner to refresh your appearance.
The Final Verdict
Creating your own hair dye at domestic is simpler than you might think, and the consequences may be beautiful. Plus, there’s something empowering approximately ditching the chemical compounds and embracing nature’s palette. So why now not give it a shot? Who knows—you may simply fall in love with the technique and your new, all-natural appearance.
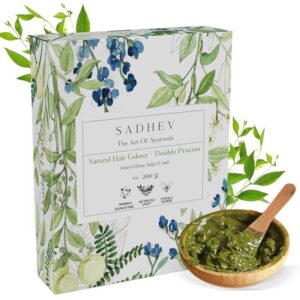
Few Natural Hair Dyes:-
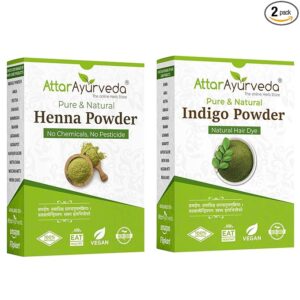 SHOP NOW: AT AMAZON
SHOP NOW: AT AMAZON
FAQ:-
1. Can herbal hair dye harm my hair?
- Natural dyes like henna can in reality strengthen hair, not like chemical dyes that strip moisture.
- Overuse of some dyes, like indigo, may additionally cause slight dryness, but proper conditioning allows.
2. How do I pick out the proper color of natural hair dye for my pores and skin tone?
- Warm tones like copper or brown work properly for warm undertones, whilst cool tones like black match cooler undertones.
- Test a small phase to make certain the color enhances your skin tone.
3. How do natural hair dyes compare in charge to chemical hair dyes?
- Natural dyes are frequently more low-priced, especially when bought in bulk or DIY-made.
- However, salon-grade natural dyes might cost extra due to top-class sourcing.
Also Read This Article: Hair fall control
Leave a Reply